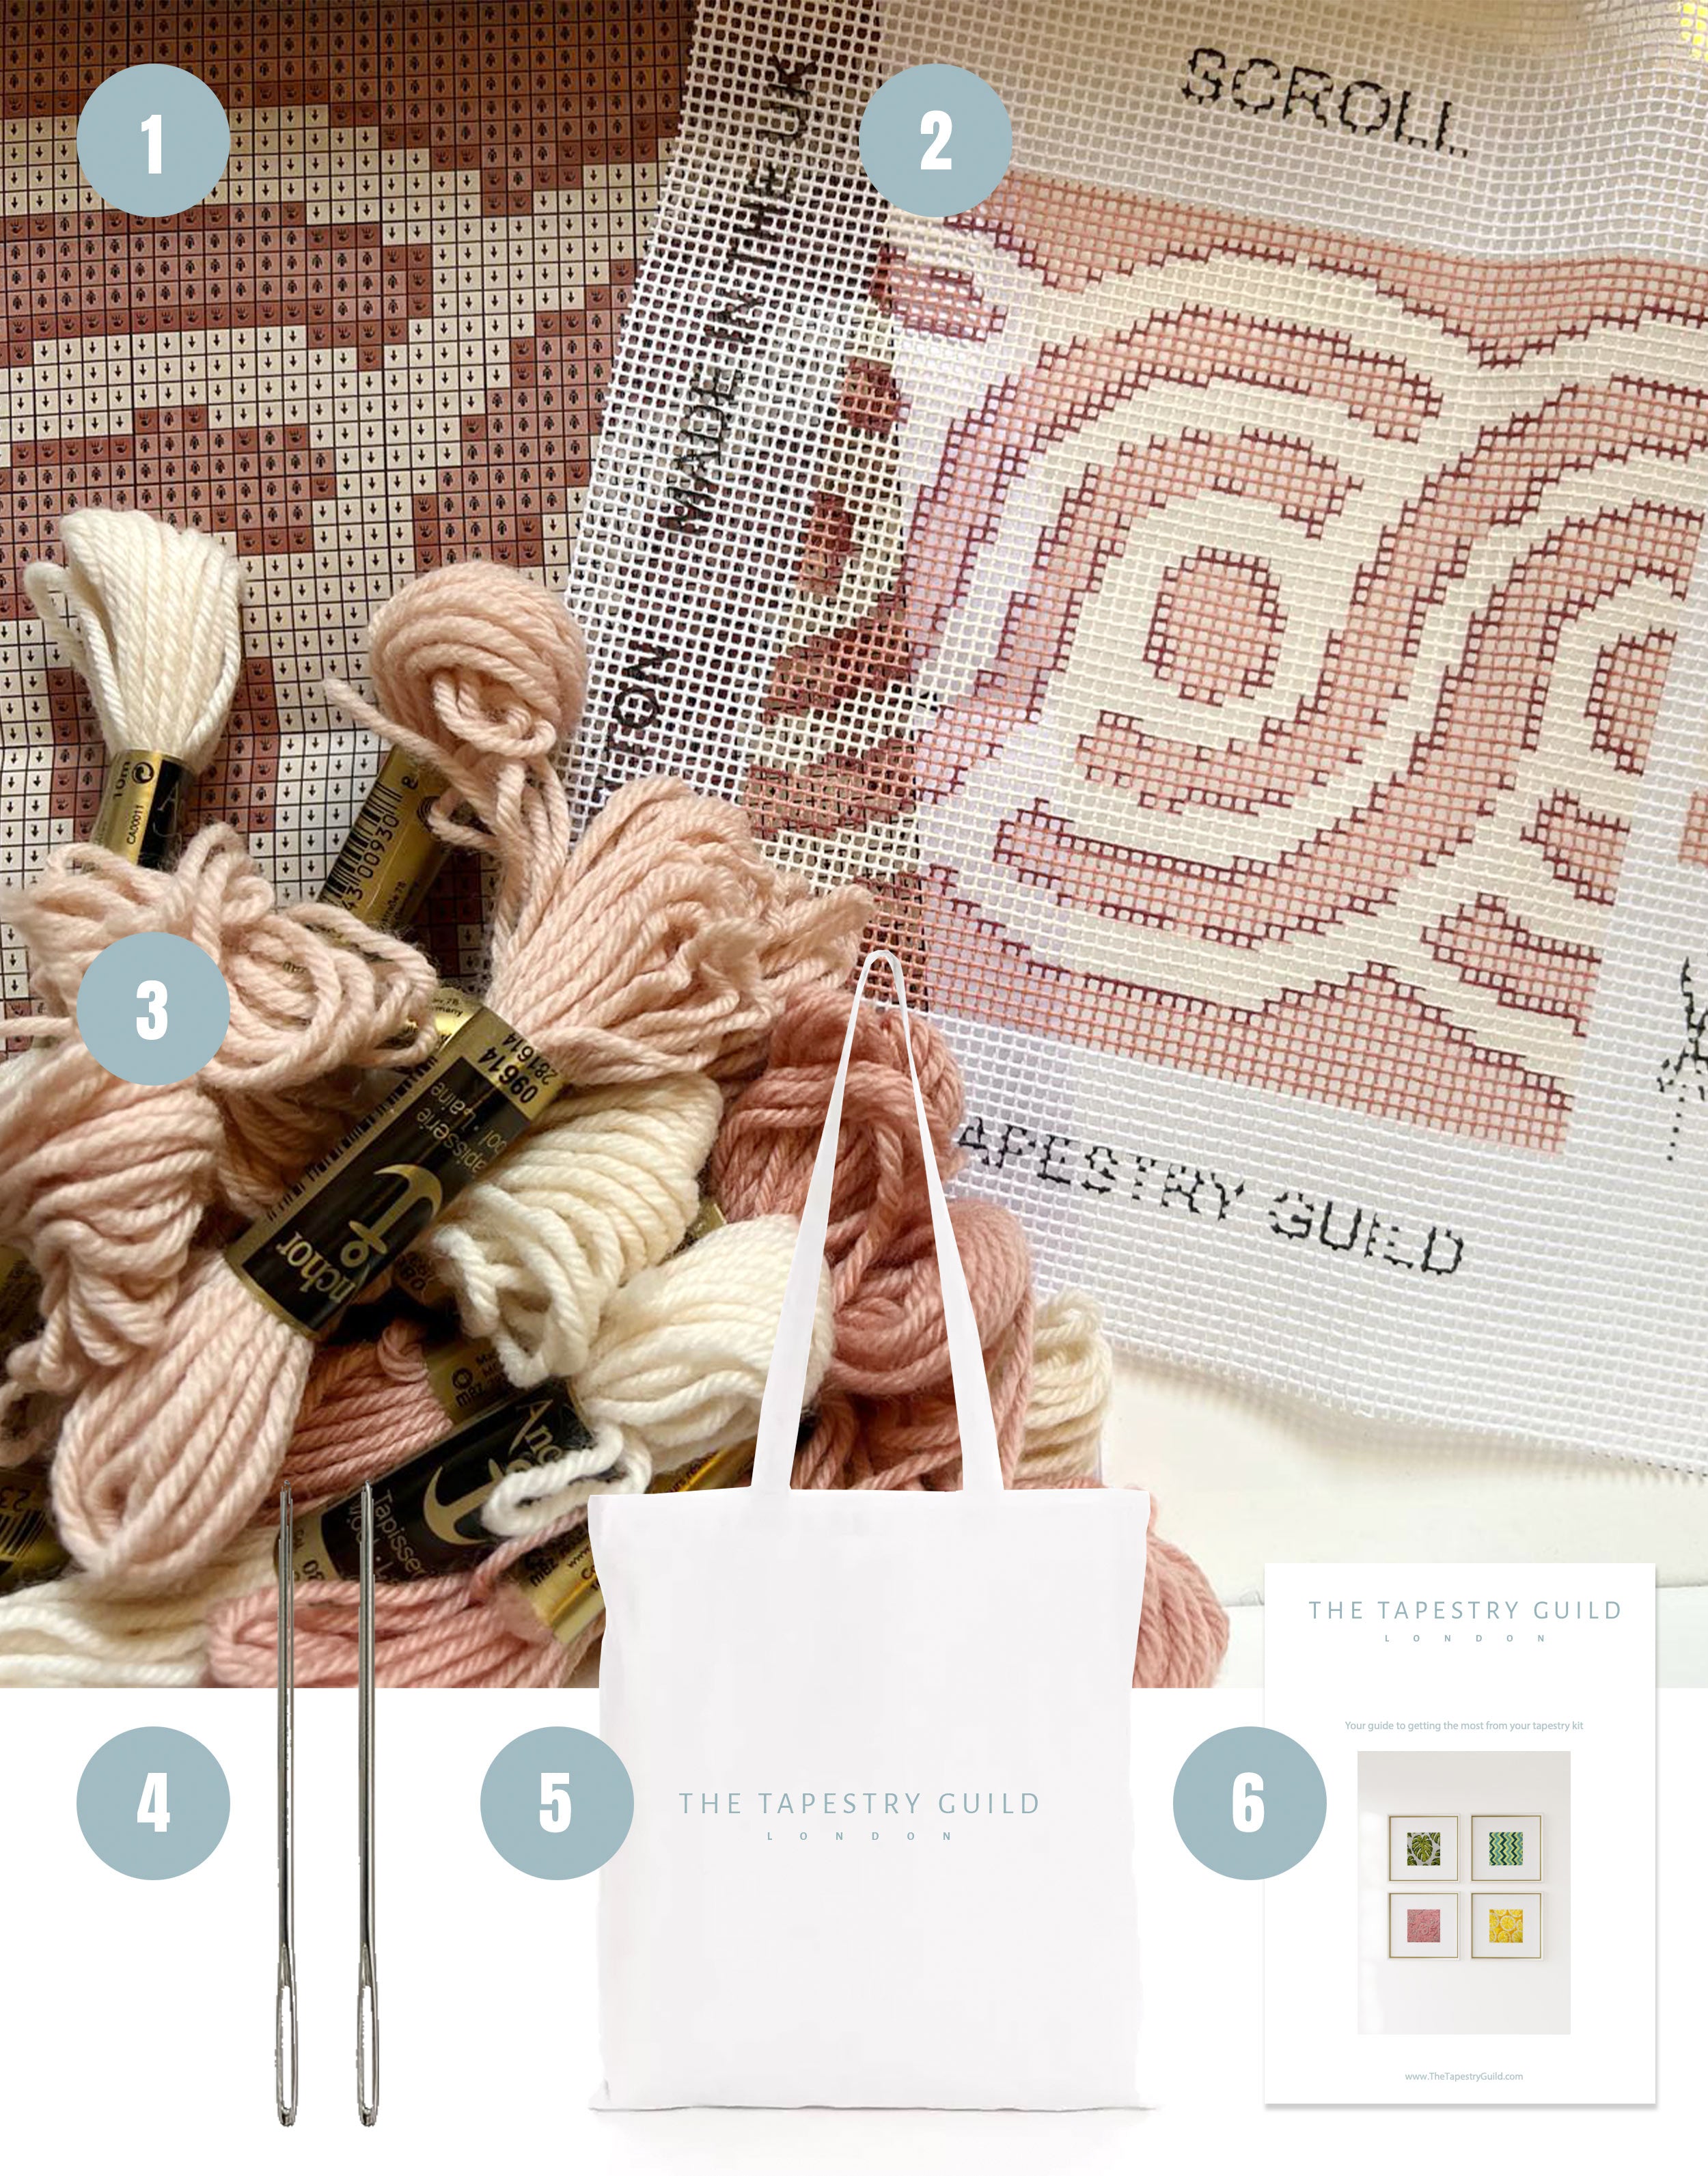
1. Familiarise yourself with the contents of your kit.
2. Your kit contains a full colour printed canvas, enough wool in the appropriate colours to stitch the design as shown, two tapestry needles, a tote bag to keep it all
safely together and these easy to follow instructions.

You Kit Contains
1) A printed colour chart with easy to follow symbols
2) A printed colour canvas
3) All the wool you will need
4) Two needles
5) A cotton tote bag
6) Your Instruction Guide
3. The design is printed onto the canvas using environmentally friendly inks which are water based. Please do not wet your canvas before stitching as the print may run.
4. We recommend using a tapestry frame whilst working your canvas. This will ensure even stitch tension and help prevent the canvas from twisting out of shape.
However if you don’t like using a frame or don’t have one, just crack on without one and you can try to straighten things out afterwards (our founder doesn’t use a frame!)
5. The colour blocks printed on the canvas at the side of the picture have a cutting line up their centre. Cut along the line and use the detached strip to correctly identify the matching printed colours within the design. This will be really useful for you throughout your project to refer back to if you’re in doubt about a colour
6. You’re going to need a small pair of scissors, maybe you will want a thimble, and maybe you will want a needle threader and magnifying glass.
7. When you’re ready to start stitching we recommend stitching with lengths of wool of about 70cm. You can cut these off the skeins (the little rolls they come in)
as required. Try not to waste the wool.
8. We advise that you work using “Tent stitch”. There are thousands of how to videos online for you to refer to if in doubt. Tent stitch uses less wool and takes up less time that Victorian Cross stitch, however if you prefer victorian cross stitch we are more than happy to send out some extra wool for you (at a small charge) should you need.
9. To start stitching, make a knot in the end of your wool and stitch down through your canvas about 2cm from where you want to start stitching, so that the knot sits on the top of your canvas. Bring your needle up through your canvas where you want to start stitching and proceed with your first few stitches, covering over the length of wool on the back. Don’t pull your stitches too tightly as this can distort the canvas. Try to keep the tension the same on all your stitches. When you reach the knot, cut it off close to the surface. When you finish an area, turn your work over and simply run your needle under the back of a few stitches and cut off the wool.
10. In order to finish your work as a cushion or a picture it must be square. If it has pulled out of shape during stitching it is possible to stretch it back into shape by lightly dampening your work on the back (fine mist with a water spray), pinning it out squarely onto a board and allowing it to dry naturally. Again - how to videos online will help with this.
11. If you want to “freestyle” a bit and swap out some colours or if you get a stitch or two wrong, don’t worry! This is YOUR piece and is for you to enjoy. Our founder regularly stitches a few stitches out of place to make it her own and we always suggest that if you want to you should do the same!
12. There are thousands of excellent how to videos on the internet for you find a really easy guide to tent stitch if you are brand new to this. We are sure that if you’re new to this craft you will be able to pick it up in no time! Have a go and you will no doubt have a lifelong hobby...


